


Today, we will explore an Exciting DIY project using the Avishkaar Pro Kit, we will learn how to build our very own Archery Bot! So, grab your kit, and let's get started.
Building the Base:
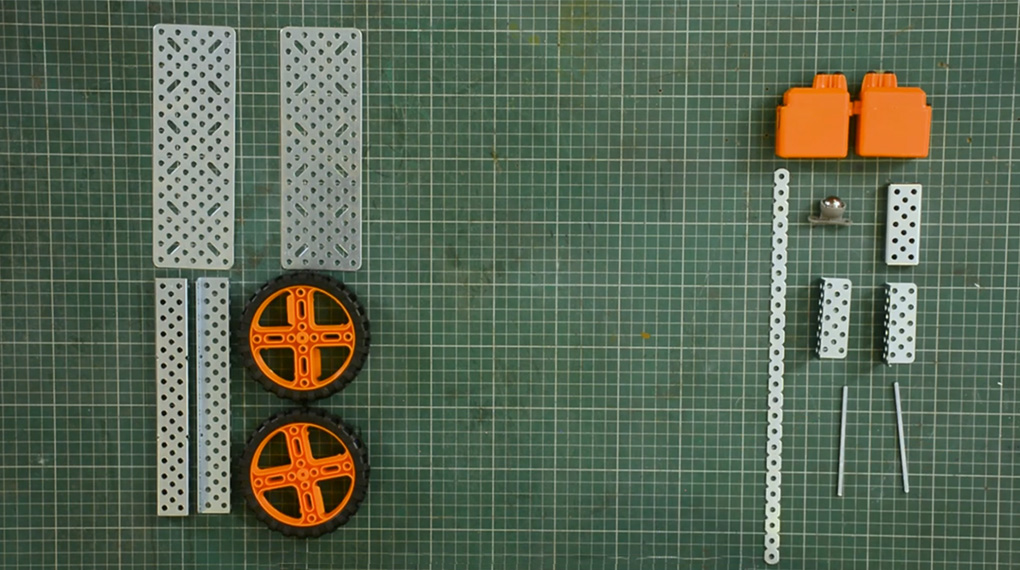
To build the base we need:
- 2 X 7.5 inch rectangular plate
- 2 X 7.5 Inch U channel
- 2 X Wheels
- 2 X High-speed motor
- X 1 2.5 inch U beam
- X 1 Caster Wheel
- X 1 Flexi Strip
- 2 X 2.5 Inch L-Channel
- 2 X 3.5 Inch Axle
So lets start building the base of the bot:
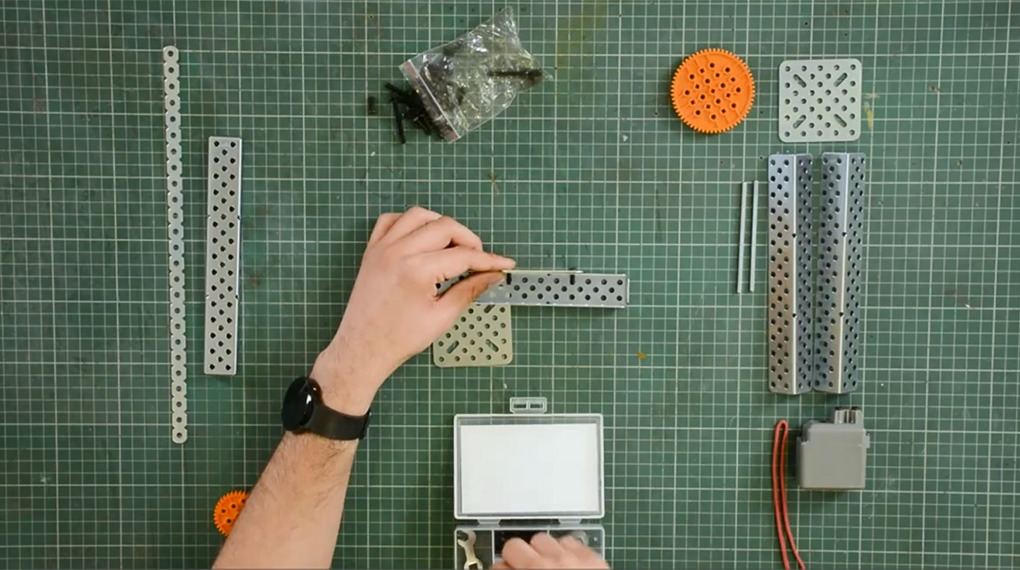
- Firstly Connect two 7.5 inch rectangular plates to two 7.5 inch U channels.
- Then connect two high-speed motors to both rectangular plates
- Next Connect the wheels to the motor using 3.5-inch axles.
- Now Connect the two rectangular plates using a 2.5 inch L channel, which will work as support for the phone holder
- Once that is done Connect the rectangular plates from the other end with a 2.5 inch U beam and fasten the caster wheel.
- Lastly Take a 12.5-inch flexi strip, break it in half, and connect it to the 2.5 inch L channel to create a DIY phone holder. This will serve as the control hub.

Now, your base is ready. Let's move on to the shooting mechanism.
Building the Shooting Mechanism:
To build the shooting mechanism we need
- X 4 7.5 Inch U beam or L-channel
- X 3 2.5 inch Square plate
- X 1 High torque motor
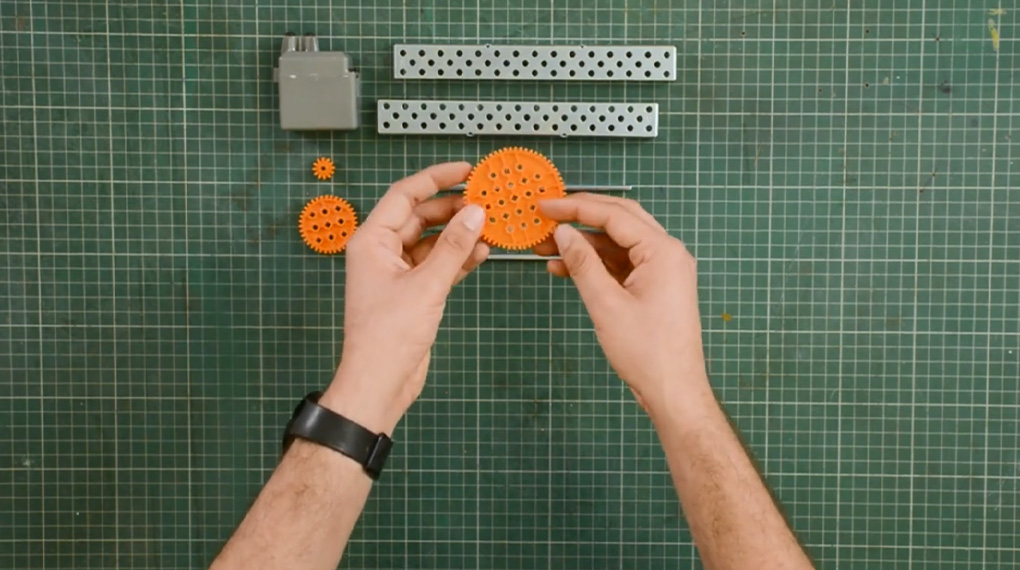
- X 1 Medium spur gear
- X 1 Large spur gear
- X 1 Flexi Strip
- X 2 3.5 Inch Axles
- And a Long rubber band (roughly 5.5 inches)
We will begin by
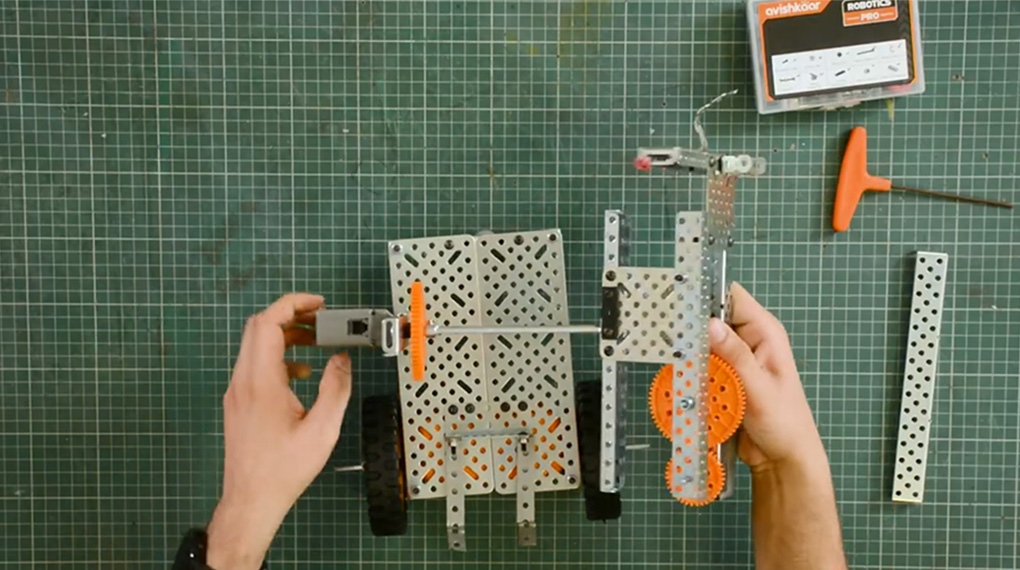
- Connecting two 2.5-inch square plates to the 7.5-inch U beam.
- Use two 3-hole connectors to align the square plates in the configuration as shown.
- Now screw two 7.5-inch U channels to the free end of the square plates.
- Moving on, let's connect a high-speed motor to the longer side of the U channel, and insert a 3.5 inch axle with a medium spur gear.
- Continue the assembly process by adding a large spur gear connected to the medium spur gear creating a locking mechanism for the rubber band.
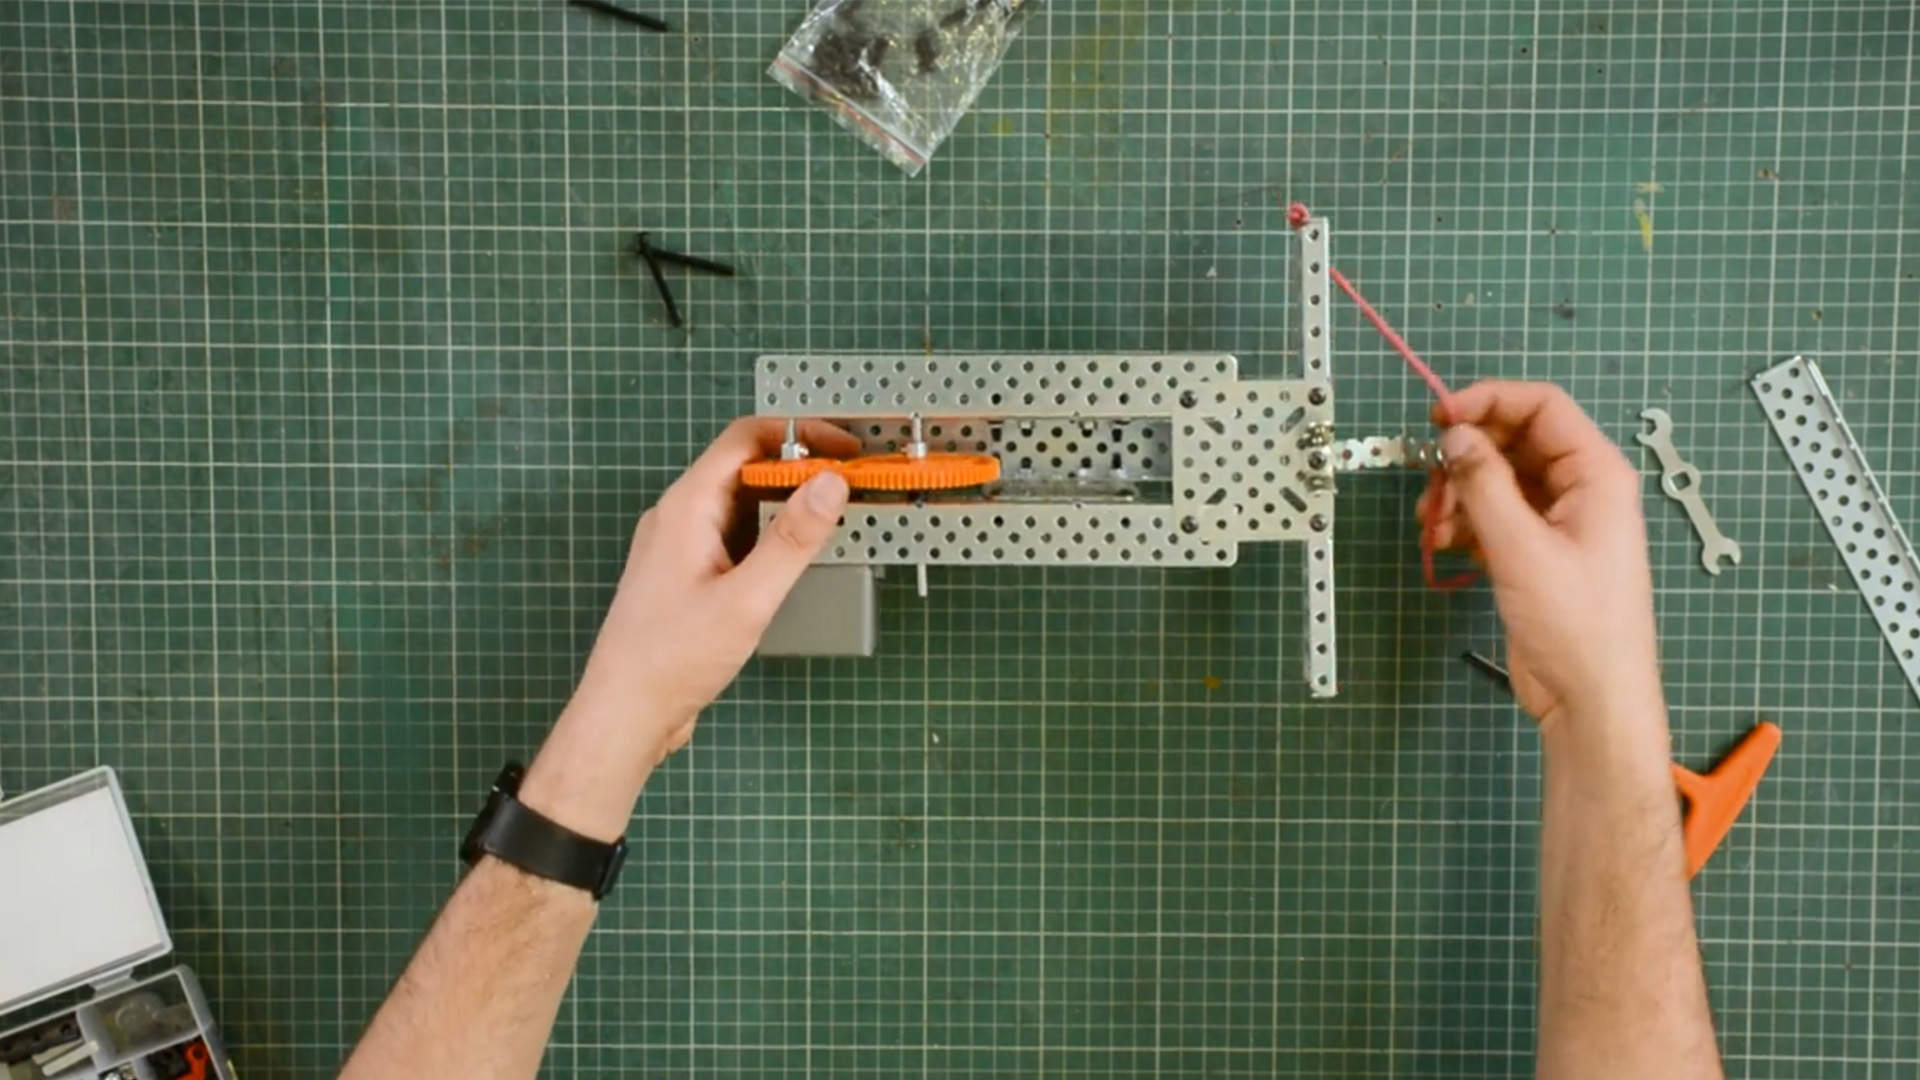
- Now attach the square plate to the free end of the shooting mechanism.
- Next let's connect a 7.5-inch U beam to the Square plate and secure a rubber band on both ends, creating tension for the shooting action.
- To provide essential support for the arrow, take the next step by crafting 2-inch flexi strip pieces and integrating them seamlessly into the design.
Building the Midsection/ Tower support:
To Build the Tower Structure we need
- X 2 7.5 Inch L-Beam
- X 1 High torque motor
- X 3 5.5 inch Axle
- X 1 Small spur gear
- X 1 Medium spur gear
- X 1 Large spur Gear
We will start by
Connect two 7.5 inch L beams to the base of the bot.
Then we will Create a high torque gear system for the up and down motion using 1 small spur gear, 1 medium spur gear, 1 large spur gear, and 3 5.5 inch axles.
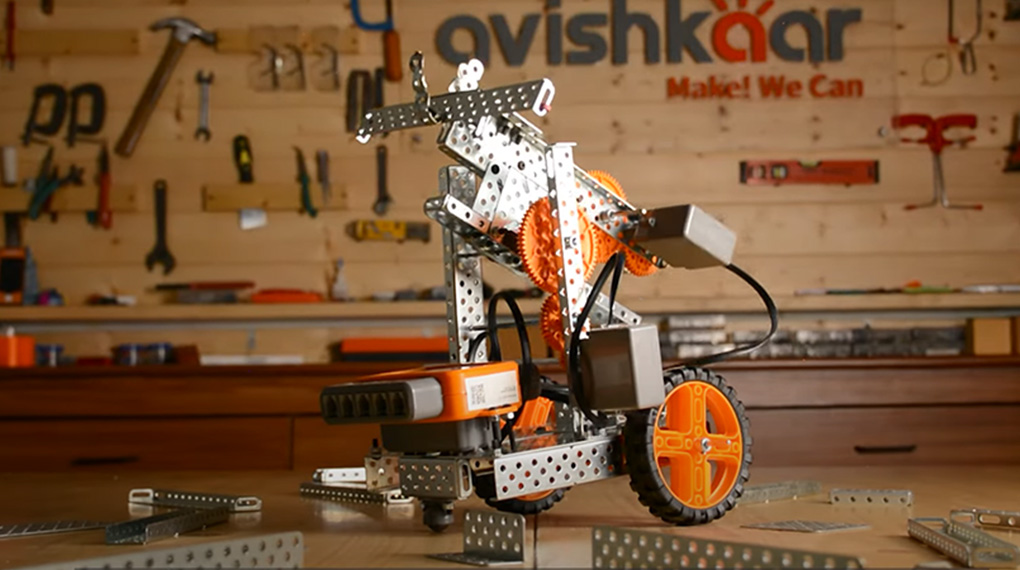
Assembling the Tower support, Shooting Mechanism and the Base:
Now it’s time to connect all the 3 parts and make our archery bot
- First we will Connect the shooting mechanism to the topmost axle of the tower support system through the 3-hole connector.
- Then Connect a 7.5 inch U channel parallel to the supporting tower with the gear system, this will act as a supporting pillar for the shooting mechanism
- Now Connect the FULL 2.0 brain to the front of the archery bot.
- Lastly Connect it to all 4 motors.
Our Archery Bot is assembled and it looks amazing!
How to Control the Bot using Avishkaar AMS AI:
There are two methods to control the archery bot Gesture control using the Avishkaar AMS AI and controller in the Avishkaar Mobile app
Lets us learn how to Control the Bot using AI:
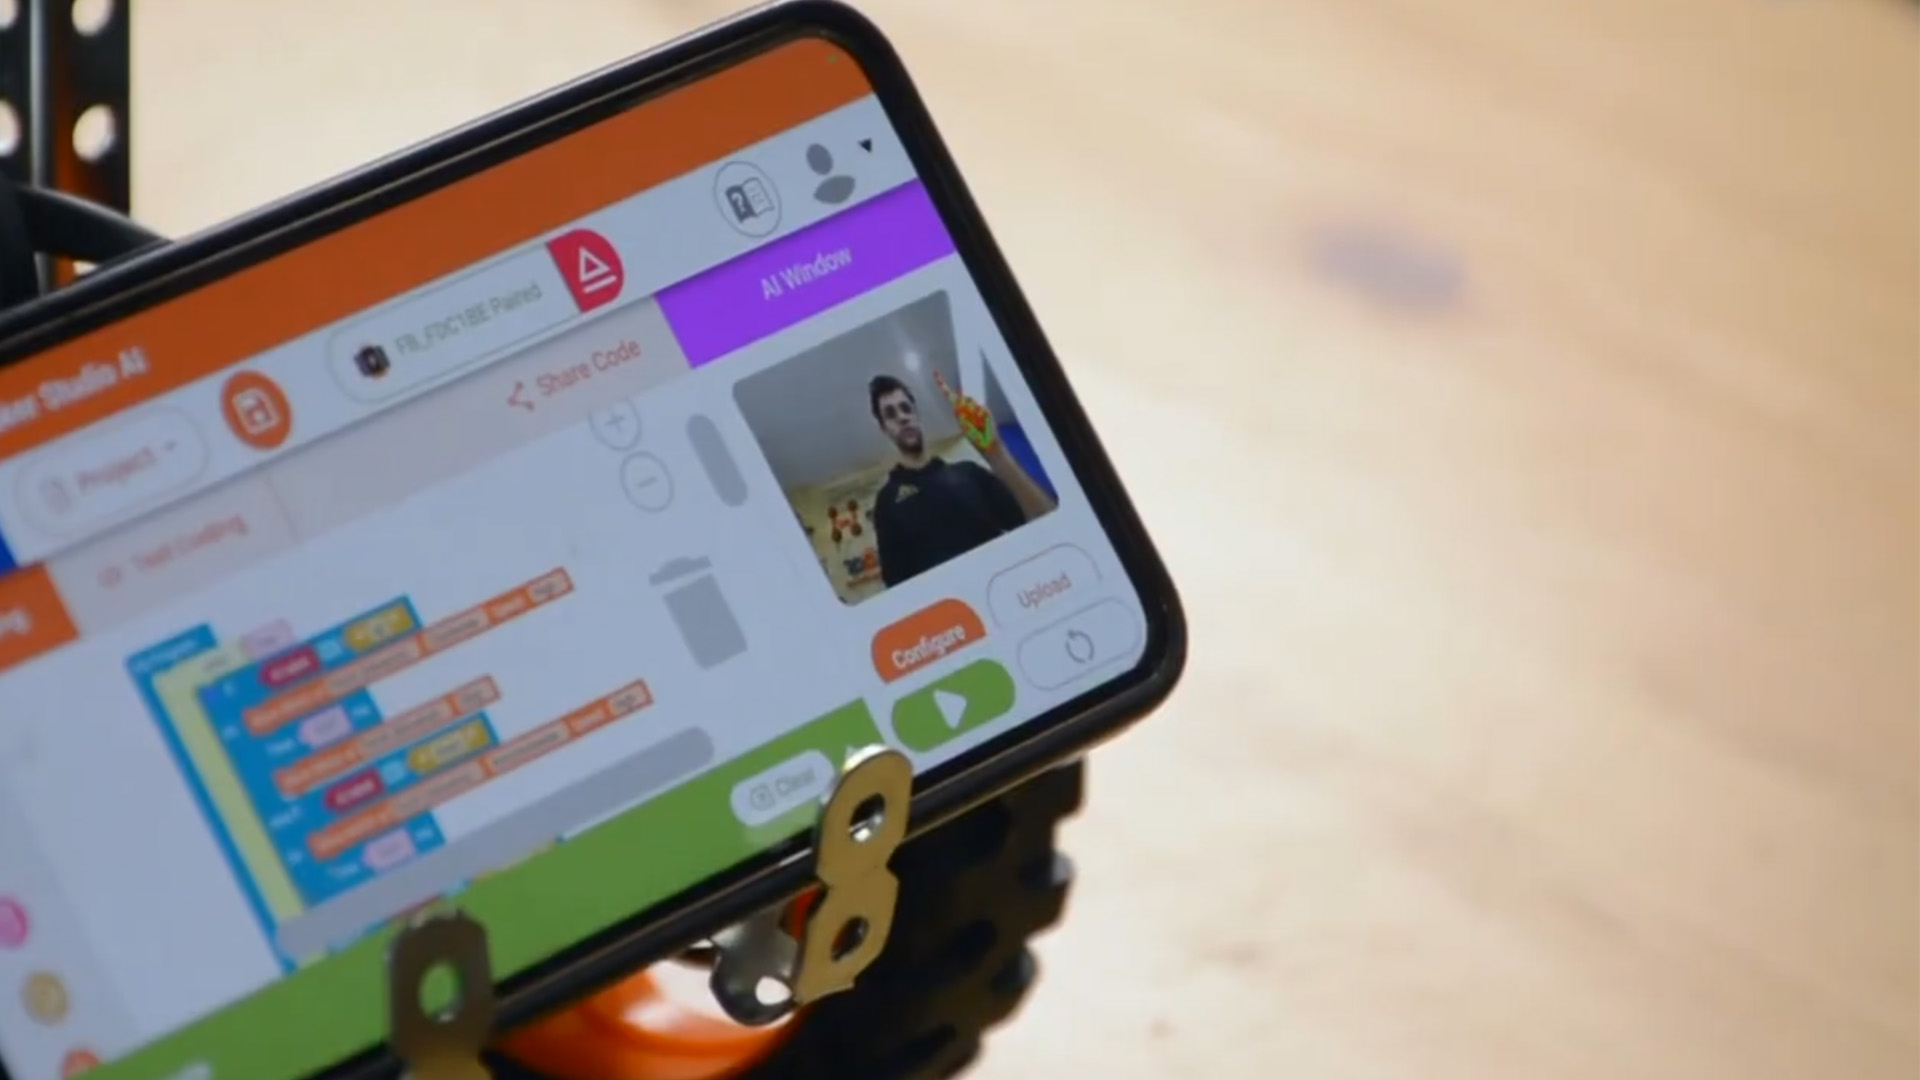
Using the AMS App to Configure AI for Shooting:
- First you will Open the Avishkaar Maker Studio (AMS) app on your smartphone or web browser.
- Create a new account if you haven't already
- Navigate to the "Code with Artificial Intelligence" section within the Avishkaar Maker Studio AI.
- Choose the "Full 2.0" option
- Upload your code into the AMS platform
- Use Image, Handpose Posenet or Face Mesh to configure your AI model, I will be using hand pose to control various movement of the bot
- With your code tested and AI model configured, let’s test the Bot out
How to Control the Bot using the App:
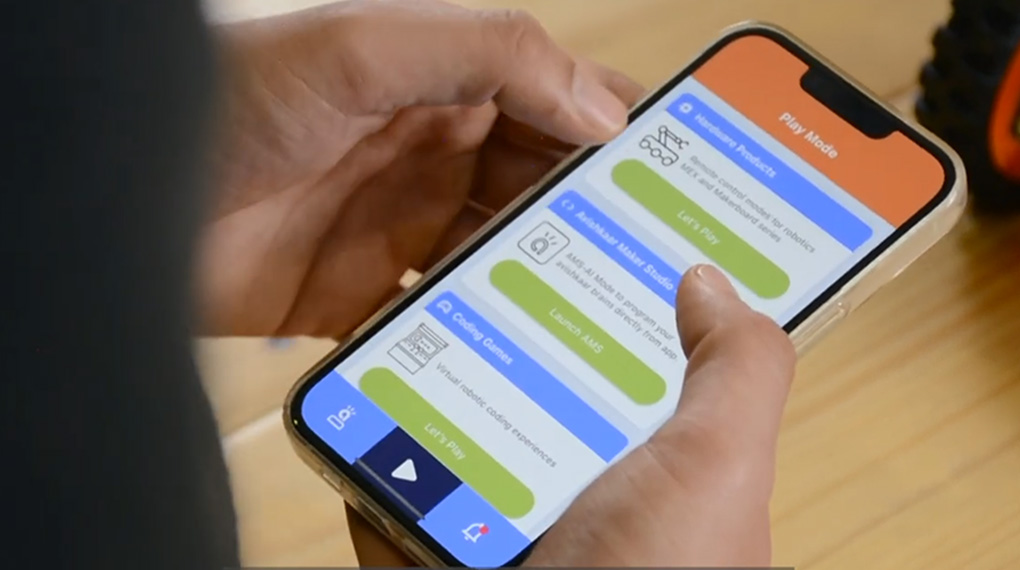
Let’s start by turning ON the FULL 2.0 BLE brain on the bot.
Then we will turn On the Bluetooth on the mobile app and open the Avishkaar app and make an account. You’ll need to register your kit before you can connect it to the brain so ensure you do that before trying to control the bot.
Let’s go to the play section and connect to the brain.
And that’s it! Now you’ll be able to configure and control the movement of the bot!
And there you have it - your very own Archery Bot! From building the base to creating the shooting mechanism and connecting it to the brain, we've covered it all. If you have any questions or want to see more projects like this you can visit the community section.
![]()
If you enjoyed this project, share it with your friends, and don't forget to subscribe to the email list for more exciting DIY projects. #DareToInnovate!
Watch the full Youtube Video Below


